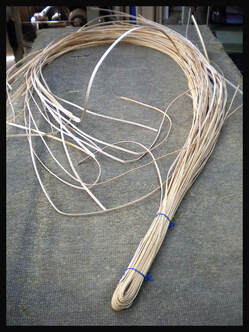
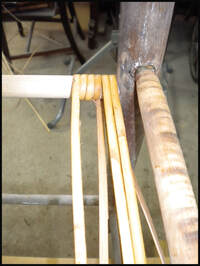
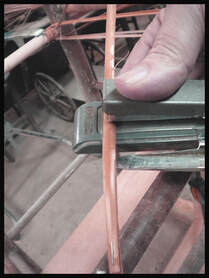
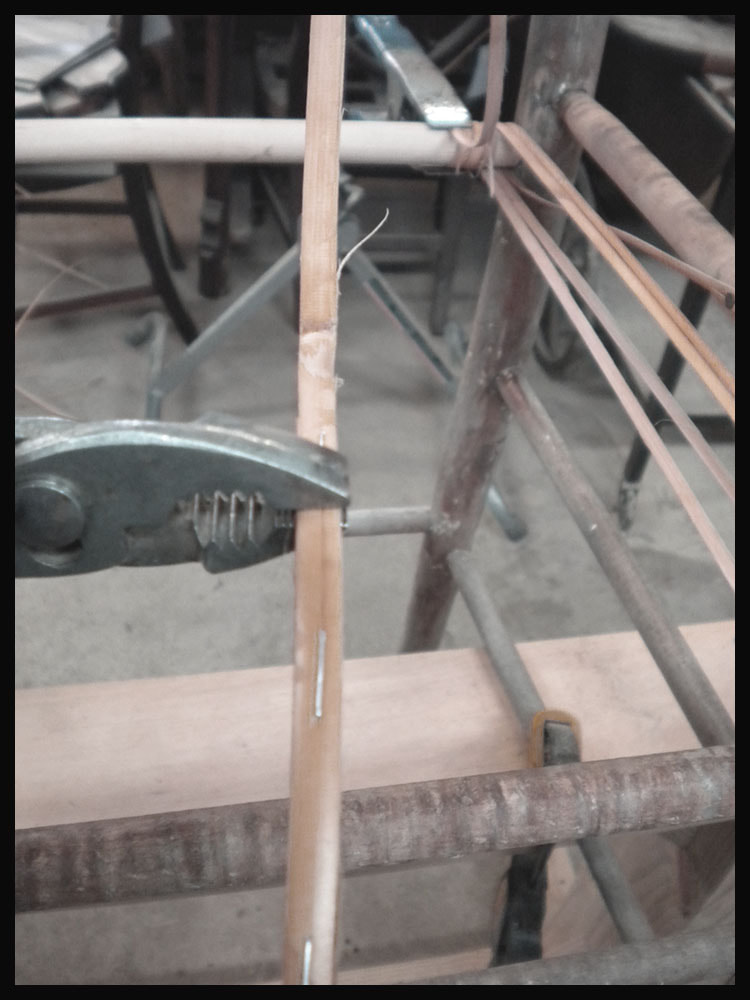
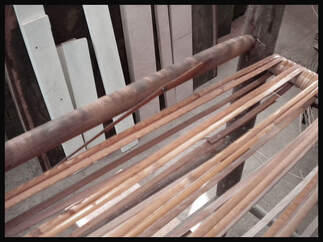
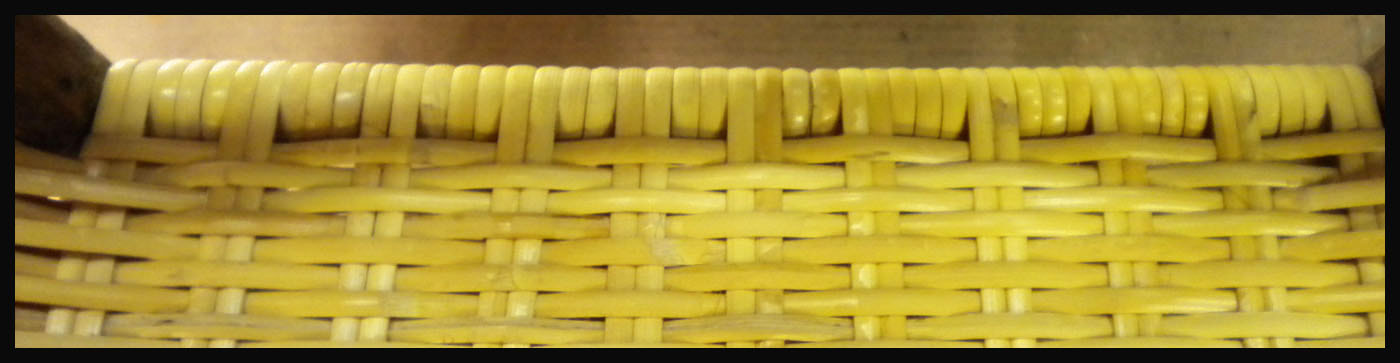
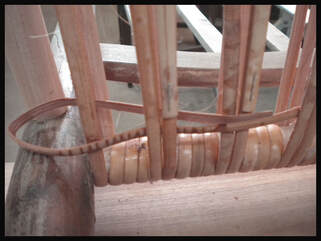
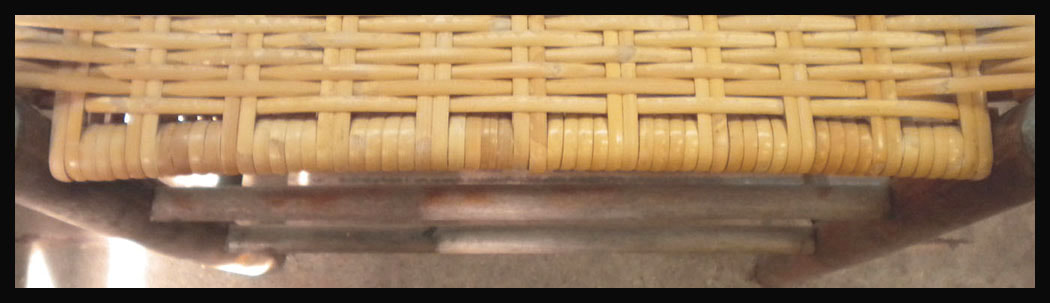
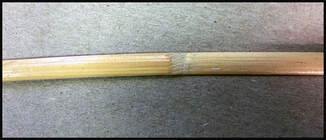
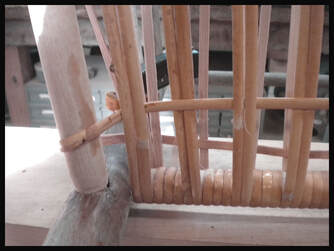
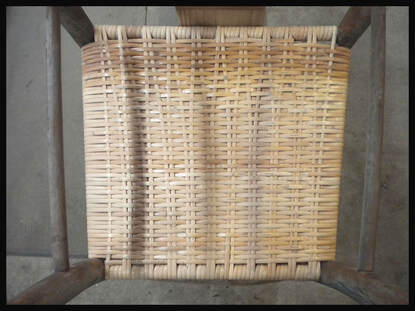
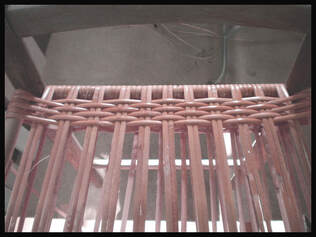
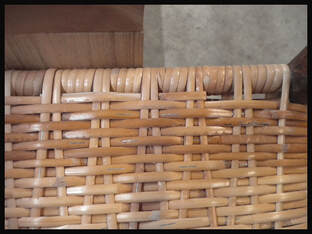
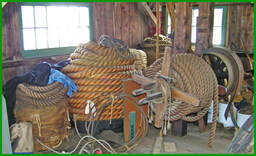
Another term for Binder Cane is Rattan. The strands generally come in widths of 4 mm, 5 mm, and 6 mm and are sold in bundles. (as shown in the Header) There are other sizes, but those three sizes are the norm for standard seats and backs. You will have to determine what size to use for your chair. It's a good idea to measure the width of the old binder cane that was on the seat before cutting it off. Do this before you throw it away. If you purchased or 'found' the chair you will have to estimate how much binder cane you will need. I will be describing how to determine the number of loops/coils and rows. Once you have a general idea of that you can rough out the total length of material you are going to use. It comes in 6 to 12 foot lengths and there are many overlapped splices stapled together to make a continuous loop. It's a good idea to over estimate the overall length, especially if it is your first attempt at weaving binder cane. Often you will have to cut a row back (shorten) to ensure the stapled splice ends up on the bottom of the seat. It is a must to have the stapled splices oriented only on the bottom side of the seat. That is the most important thing to remember with this type of weave. Also make sure your staples are stainless steel if the chair is going to be placed on a porch or outside.
The two photos below are of a simple stanchion I made to hold chairs in place in order to safely weave seats and/or backs on them. You can design and make it any way comfortable for you. There is no vertical adjustment on this design but will work for the average person.
The chair you see above is often called an Acorn chair because of the unique shape at the top end of the back legs/seat back. This one is made of clear maple and it had been left outside on a porch to weather for a good number of years of its approximately 60 year life, to date. Originally, it probably had a nice varnish finish (usually was varnished) and was not left out in inclement weather. Today's owners do use it as a porch chair and aren't concerned about it having a nice finish, which of course would need continual maintenance. When I accepted this chair for repair it not only needed a new seat it also needed a new cross or spreader dowel in the back. I had to disassemble the two sides in order to replace the broken dowel. Then I re-glued it and let it set for a couple of days. I used exterior glue because I knew it was going to be left outside.
Make note: I seldom use exterior glue when repairing furniture, because of the difficulty of repairing or replacing stringers and spreaders again in the future. Joints with external glue seldom break but when they do they may break a portion of the chair with it. Remember this in your own repairs.
A front view of the setup to hold the chair in place to weave it. You will notice that I created a simple stanchion made of two by sixes so the seat is positioned at a comfortable height to work on. I suggest you do the same. Setting it on a work bench will normally be too high and hard to clamp in place. Usually, two bar clamps with rubber pads on their faces are all that is needed to hold an average sized chair steady. I have included a couple of photos of the stanchion at the end of the chapter.
|
The two photos above are to show where to measure the distances for the back and front. These measurements are normally done when all the binder cane has been removed. On this chair the back measures 11-1/2 inches wide and the front measures 14 inches. You need to know these measurements in order to determine the number of wraps/loops/coils between the rows (rows running from front to back). I had already reached this stage before I realized I needed to add photos of the measurement steps. That's why you are looking at photos "down the process."
Before I start to weave, the binder cane had to be softened so it bends easily without splitting or breaking. I mentioned how to do this above. Don't soak all of the pieces at the same time, because some will become over soaked. Once you see the strands are pliable you can begin the weaving process. When pulling a strand out of the water slide it between your fingers and to eliminate excess surface water.
You can start from either side of the chair seat, (it depends on whether you are right or left handed). The photo above shows you where to start, approximately. I use carpet tacks to fasten the strands to the side dowels. There will only be 2 tacks used, one to start and one to finish. It has a decent sized head diameter for holding the cane. Make sure the tack is placed 2 to 3 inches from the end of the cane so you don't split it. Also, there and many variations of heads on carpet tacks, pick one with a low head height profile. The binder cane I used on this chair is 6 mm material which ranges just under a quarter of an inch (about .236") in width. Because it is a natural fiber, binder cane is not consistent in width. It is, after all, a grass of sorts. |
The first layer you are weaving is the 'bottom layer'. You can see here two strands are wrapped around the front and back dowels or spreaders. Notice how the second strand at the back goes back at an angle because it was split up by the three 'spacer' coils or wraps. The material also has growth nubs along its length. I'll talk more about this when I describe how to weave the top layer.
Important: As you determine the number of rows and spacer coils or wraps {2 strands each} you want to come out with an odd number rows. You do this to make sure you have a row on the far left and the far right, to do that you have to have an odd number of rows. Note this view is actually showing 4 spacer coils. |
The two images below are showing hand clamps to hold strands in place while you are splicing the ends of a new piece. Make sure you use a hand clamp strong enough to hold the strand, although there isn't a lot of pressure on the strand if you wrap it before clamping it.
In this view you see the back row starts off having three coils or loops. Obviously, you would have fewer loops in the back because the back is narrower than the front. I'll go into more detail on how to calculate the numbers of coils in the steps ahead.
After weaving to this point it was time to splice a new piece to my strand weave. I overlap the two ends by as much as 4 or 5 inches and using a regular (full sized) paper stapler, staple the overlap in three places. Staple the middle first, then making sure the strands are aligned with each other, staple the ends. You can see the approximate locations in this photo and the next. Look for stainless steel staples just to be on the safe side. (not critical)
As mentioned above, you can hold the coils or loops or strands in place with a hand (squeeze) clamp while you staple the ends together. |
It is also important to squeeze the staples flatter than what is accomplished with the stapler alone. The stapler leaves two little bumps on the staple and they can cause a snag in the next weaving step, if they are not flat. You will need do this frequently; take your time and make sure the spliced ends up on the bottom of the seat and the staple is flat.
|
If the binder cane sizes were perfectly sized I could divide it by that particular width standard and come up with the number of rows and coils. Because the labeled millimeter sizes of 4, 5, and 6 aren't exact I have to determine the average width. To do that I'll convert to inches and estimate the .236 inches as the size and divide that into the 14 inch and 11-1/2 inch distances on the front and back. When I do that I get 59 and 1/3 strands, so I start out weaving with that as my number. Using the .236 inch estimate of 4 coils sets and 2 strand rows for the front I come up with 11 rows and 10 sets of coils.
The photo below shows the progress after 3 sets of rows and coils are woven. At this time I can get a little better idea how many actual loops I will need and plan my weaving accordingly. In other words I can now get a more accurate estimate of the number of coils I will have to weave in. If I multiply the number of coils and strand wraps (16 coils and strands) in the photo above using the measurement of .236 inches for each I would end up with 4.248 inches. However, as you can see from the photo, instead of the the 4.248 (4-1/4 inches I've measured 4-1/8 inches, or 1/8 of an inch shy. This means the actual average is going to to be about 0.2295 inches. And that is still subject to size variation because what I measure was a little less than a third of the total amount. Now I divide the 14 inches (width of the front spreader (dowel)) by .2295 inches and instead of the 59 and 1/3 strands I originally calculated I get 61 coils and wraps, or roughly 2 more wraps/loops. I am not going to change the number of rows because there isn't enough distance to make that look right, but I can 'even out' the look by dividing the loops as follows: I still have the total of 14 inches and I subtract width (5.049 inches) of the combined 11 rows or 22 strands. 14 inches minus 5.049 inches leaves 8.951 inches. This number represents the total measurement for all the loops. 8.951 divided by 0.2295 comes out to 39 loops. Not being an even number I know I can't have 4 loops between all the rows. To have that happen I would have to have either 40 or 36 coils. 40 coils will simply not fit. I know that in choosing 11 rows, I have 10 sets of loops. With 39 loops I am one loop shy of the 40 loops for the chair to come out even. Having done this many times I know that creating 3 loops between that last 2 rows solves the problem and is not very noticeable. The next photo shows that you end the bottom layer by tacking it off in the same way you started. There are 11 rows of strands in the bottom layer. I will speak to the number of coils or loops soon. |
The photo below left shows a partial view of the completed bottom layer
When I have finished the full seat, I weave an independent strand in both the front and back to fill the spaces that exist. This finishes off the seat and gives it a finished look. Note the strand does not wrap around the side dowels for the simple reason there is no room for it. This is just a showpiece filler. View from underneath. Start the top layer by weaving a strand (a repeating up and over, down and up and over) process. This photo is of the end of the first cross row and it is being folded over and will be pulled tight. I'm showing the finished seat in two views below so you can see the coil or loop variation/count.
The back dowel or spreader starting at the left has three sets of three loops, then three sets of two loops and then four sets of three loops. In the photo below right the front dowel or spreader starting from the left has only one set of three loops and the remainder have four loops. |
When I have finished the full seat, I weave an independent strand in both the front and back to fill the spaces that exist. This gives the seat a finished look. Note the strand does not wrap around the side dowels for the simple reason there is no room for it. This is just a showpiece filler.
The photo below is a view from underneath. Start the top layer by weaving a strand (a repeating up and over, down and up and over) process. This photo is of the end of the first cross row and it is being folded over and will be pulled tight.
|
This photo (below) is of a growth node or nub. Lightly run your finger over the surface of the binder cane at this point to determine the best direction to weave the cane. One way it will have a tendency catch on the bottom layer strands as you weave the seat; the opposite way it will not. These natural blemishes can be frequent enough to cause them to be seen on both the top and bottom surfaces of the seat.
|
Note and Reminder... even if you have two exact sized chairs the rows front and back will most likely remain the same at 11, however the spacer coils are quite likely to be different by a coil or two. That is due to the variation of the width of the binder cane.
The finished seat as seen from underneath. Notice all the staples an nubs. Take a good look at the strands of the base layer and how the top layer is woven to it. Remember one of the strands from the front runs at a diagonal because it is split by the wraps or coils that space the strand rows.
To the right is shown the finished seat as seen from the top. The first 5 or 6 cross rows in the front are a different shade because they are still wet from the soaking process.
There are shade variations of the cane and if you want to avoid that make sure you have plenty of cane. Most folks, including myself, like the natural variations. I believe the variation adds to the uniqueness of the seat and the natural look and feel of the material. When you see a seat done with a plastic weave it is all one color and to me it looks plain and without character. |
Directly below is a photo of a partially woven top layer. You will continue to weave the rows across. Use your fingers to push or pull the stands sideways against each other as tight as you can easily. You just want make sure to not leave any gaps between the strands as you weave. Its weaving process is easy and progresses pretty fast. Just pay attention to keeping the staples and nubs on the underside of the seat when you can. (Second photo below)
I hope this Binder Cane DIY was helpful to you. You can send photos of your finished chair by attaching them to the contact page. If they are nice clear pictures I might decide to add them to this site, with your permission of course.
|