|
|
|
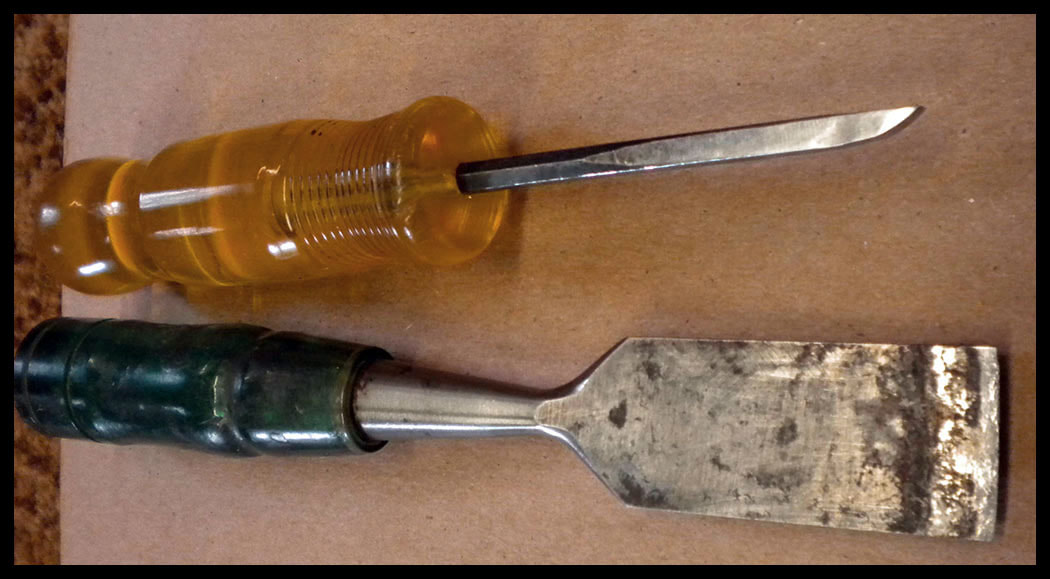
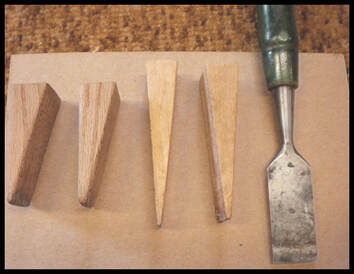
Use the tools recommended in the photo below to clean the groove.
|
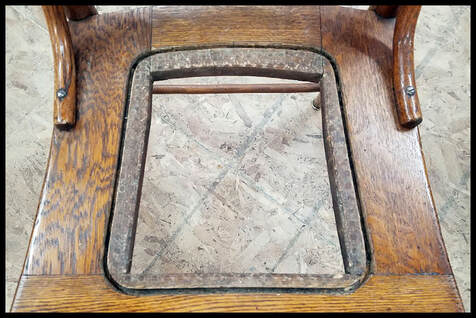
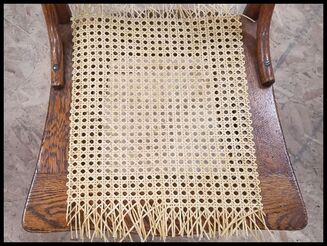
The photo above to the left is showing the cleaned out groove of the seat the cane and spline will be pressed into. Take your time during the removal process making sure you don't damage the outer flat of the seat face or injure yourself. There isn't much you can do to repair damage to the outer edge of the groove. Damage to the inner edge won't matter too much because the press cane will be hiding it. If the last person installing the seat used a waterproof glue it is going to be difficult to get the groove really clean. So be careful.
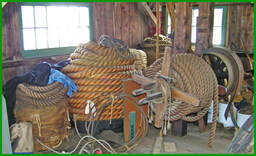
Cane rough sized to the chair seat width and length
|
This page contains a series of photos on how to install 'Pressed (pre-woven) Cane'. There are are also books available online to help you that may be more detailed than I'm giving you here. Buy or order your pressed cane and spline before you remove the old seat, if the old seat exists. I say that knowing it can be a catch-22 circumstance for a novice, i.e. if you don't have experience in buying the materials. You will want to replace the cane and the spline with the same sizes they were to begin with. If the previous spline that was used was too small the seat may not have lasted very long to begin with. So it is important to measure the size of the pressed cane material and the spline. If you are starting with a chair that has already been stripped of its cane it means you have to some decisions to make on what size to use. There are plenty of sizes of pressed cane to choose from. Size, meaning how large the holes are in the woven cane you are going to buy. There are plenty of sizes to choose from. You then have to determine the hole size with in the woven material is the first you will want to determine. Then the size of the spline before you can order your materials.
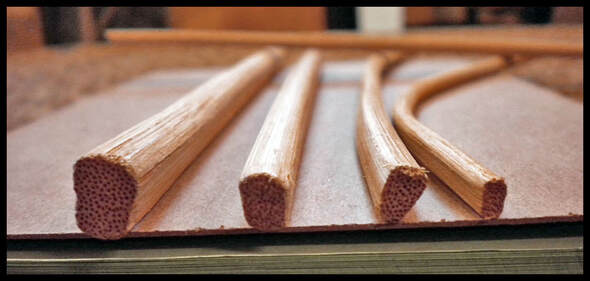
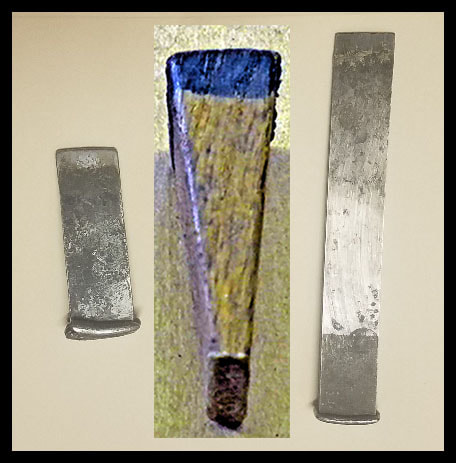
Some of you may find the expense re-caning your chair to be high because of the cost of materials, especially if you plan on caning only one seat. Most suppliers of caning material do business with professionals. If you plan on installing cane on a number of seats or seat backs you might try buying in bulk and save a little money over the long haul. Splines can be frustrating to buy because they range in close graduations of sizes and they can't be too big or too small. See photo of spline ends below.
For a short video on how to install cane in a chair seat, skip to the video file below
Remove the old pressed cane seat making sure the groove is completely free of glue. Take your time and do it right, any debris (old glue or pieces of it stuck in the groove will definitely cause a problem for you when you start installing the new cane. On another note, if you have a chair with holes and no groove it is not a candidate for pressed cane. Although If you wish, your chair can modified and I will give you some suggestions on how to convert it to having a groove at the end of this page. (future)
Installing a cane seat correctly will give you a great deal of satisfaction and you can proudly tell folks you did it yourself. Caution...One last thing before you start the caning process, look your furniture over carefully to see if any joints need gluing and/or parts need repair. There is no sense in spending your time and money to cane a piece of furniture in need of repair or refinishing. Check around, for cane pricing, which varies considerable depending the amount want to buy. I'm buying elsewhere because I buy in bulk making prices cheaper. The sizes of press cane are measured from center of hole to center of hole. They run from 3/8, 7/16, 1/2, 9/16, 5/8, 3/4 and 1” The larger the weave the larger the strands of cane in the weave. This is the standard cane weave with the octagon holes. The most common size used is 1/2" and shown in our example. There are other patterns of press cane weave available and some of them are too delicate to use in a seat. They are used for the backs of chairs or decorative projects. The size of the spline comes in different sizes starting at 5/64 to 5/16 in graduations of 1/64 of an inch. There are companies that sell online and will send samples of their material.
Two companies https://www.franksupply.com/ and https://hhperkins.com are set up for dealing with small quantities, But shop around.
Two companies https://www.franksupply.com/ and https://hhperkins.com are set up for dealing with small quantities, But shop around.
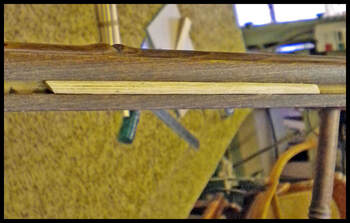
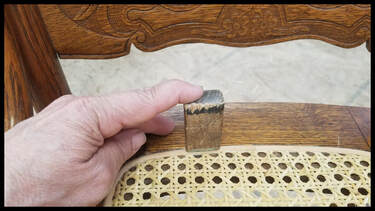
After cleaning out the groove, measure for the size of the spline using various sizes of spline. This means buying a number of samples if possible. Notice from the photo that the ends are slightly wedge shaped. Obviously, You want the thickest width (the top) of the spline to fit 'slightly' snug (wouldn't fall out if tipped upside down) in the dry groove (without cane in it). If you did pre-purchase the spline use this step to check to see if the size you chose is correct. And yes, that pressed cane has to go in there too. It's not called pressed cane for nothing. With the correct sizes your wet cane and wet spline will pound into the grove easily, although nice and tight when you get to that step. I included a larger photo of the spline ends to show, not only, some different sizes, but also the porosity of the spline. It is this porosity that allows the necessary compression on the spline to hold the seat in place against the sides of the groove. This helps you see the importance of using the correct size spline.

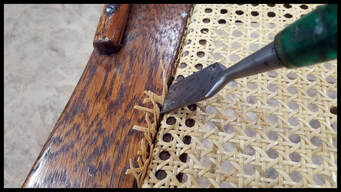
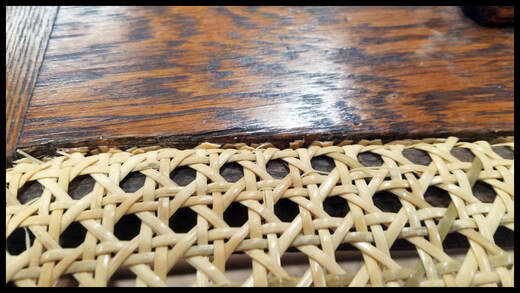
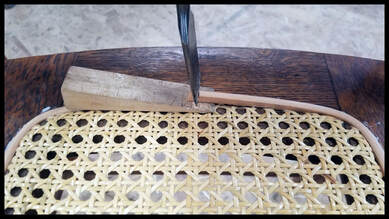
Here again I remind you to keep your chisel nice and sharp. You need the cut to be clean and parallel to the groove and not sticking up past the spline. Above is a view of a section that has been cut cleanly.

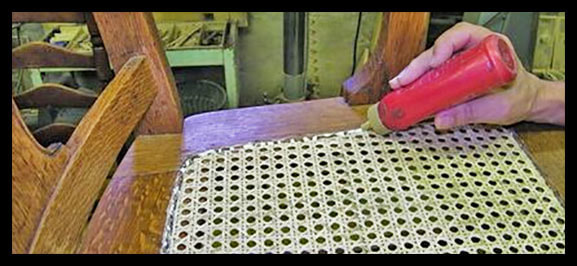
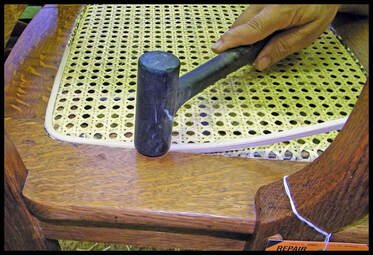
Use the large wedge or a larger one to finish pounding in the spline. In the photo to the right you see a plastic hammer being used to pound the spline into the groove. The hammer head can make the surface of the spline appear a bit lumpy. The large wedge is used to make the spline fit flush with the wood of the seat. Take your time to get this done. You want this spline to look smooth all the way around.
|
This photo left shows testing the size of the spline. If you have a few sample sizes, try to find out which one is the best fit.
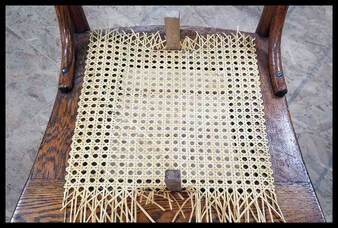
Tools required to install the pressed cane are shown left. You can make your own tools rather easily from wood scraps for the wedges old chisels and ground down putty knives. Re-align the press cane to the seat as you did when sizing it before removing the extra rows. Carefully begin driving the cane in to the groove using a wedge/tool of your choice. Go around the rim of the of the seat a couple of times to be sure that all of the cane edges is deep into the bottom of the grove. Make enough wedges so that you can leave some of them in place to keep the cane from pulled out of the opposite side. The tool with the yellow handle shown earlier is a special tool used for removing the old spine. You can purchase this or make one out of an old chisel. Frankly, I recommend buying one.
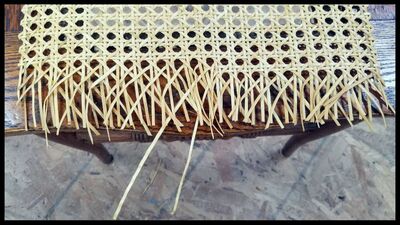
After aligning the wet pressed cane to the chair seat pull out 'some' of the rows of cane (those that run the length of the groove) so that so they don't get in the way when installing the spline. I'm only describing those rows which are outside of the grove, so don't remove too many. Review the photo above to see what I am describing. Once you have done that and before placing the press cane in position apply a small bead of water-based wood glue to the inside wall of the grove.
Don't use any super-glue or exterior glue type of products so that the next time someone has to re-install the seat they will be able to clean the groove without too much difficulty and without damaging the groove. I've seen lots of beat up grooves and they take away from the beauty of the chair. Next...start tapping the cane into the groove starting from the middle of the front & back of the chair and work towards the side corners. When starting, tap in only 2"-3" (from center) at a time. Alternate left and right and front to back, working your way across the chair. This is where you show your finessing skills, so don't rush the job. If the cane looks like it is starting to get crooked stop, pull some of it out and start over. You won't be able to do this more than once or twice, but don't panic, you'll be fine. (If the groove is curved to match the chair getting the cane a little out of line won't be too noticeable.) The other important thing is to make sure the wedges you are using to tap the cane in place are small enough not to get stuck in the grove, but large enough to hold the cane in place when you install the spline. Then tap in the sides using the same process (from the middle outwards). As you complete tapping the cane in place use your larger wedges to hold it in place.
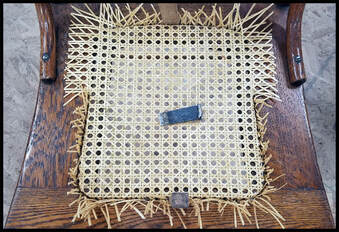
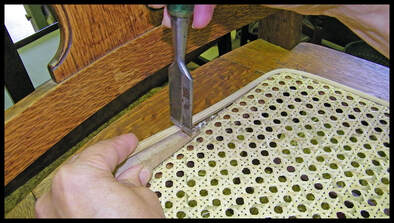
After you have pressed the cane into the groove using the wedges in the photo below and leaving some of the wedges the chair should look something like the photo shown lower left. In the lower photo below excess cane is being cut off just below the surface of the chair with a wide sharp chisel. If you put too much glue in the groove it will show now; wipe it off with a dry rag. A damp rag can be used also to wipe off the film of glue that gets on the top just don't allow any excess water to get in to the groove because the glue you are using should be water-based. It's common to put more glue in the groove than you need, so be careful with the amount of glue you use, you don't want excess glue hardening before you get to the next step. Rinse the rag frequently. If you put too much glue on the rag it will end up being smeared on the surface of the cane and wood around the chairs surface. Do your best to avoid that.
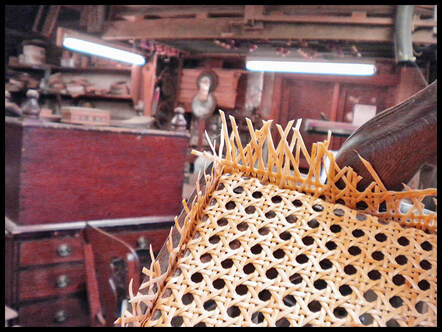

The photo above shows the cane all pounded in to the groove. You won't have a need to leave any wedges in at this point. The next step is to apply the glue for installing the spline in place (Left photo). It appears a little sloppy, but that is because of the all the cut strand ends. You will
be cleaning the glue off as you start pounding the spline in place. Remember, most of the steps you have gone through already and the installation of the spline does not allow any time for you to stop or pause the process. Before installing the spline in the groove run a thin bead of glue on each side of the groove on top of the pressed cane you already have in the groove. Then you can start installing the spline. But before you do this is a good time to make sure you have done a good job of trimming the outer edge of the pressed cane so no strands are sticking up. Use the wide chisel again or any sharp utility knife you are comfortable using it, although I always use a chisel because it is the best tool for the job. Further more, I highly recommend the chisel because when using a utility knife there is a greater likelihood that the blade will slip out on to the surface of the furniture. You can trim extruded ends after installing the spline cane, but it is far more difficult to do and you may still have some of the ends sticking up and not looking as professional as if you do it at this step.
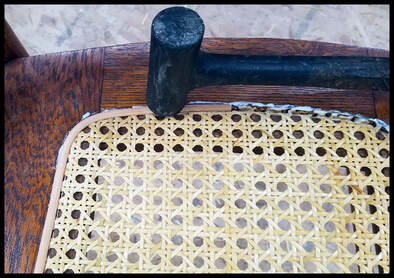
Note: start the spline at the back of the seat (roughly in the middle) so that you don't have a seam in the front of the chair. Keep tapping the spline gently into the groove using a hard rubber or plastic hammer moving around the seat until the spline is fully seated except for the end that has yet to to be cut to length.
Lay the end of the spline to be cut over the top of the starting end and mark it with a pencil or fine marker pen. Slide a wooden wedge under the end that needs to be cut and use that sharp chisel to cut away the overage at the mark. Once done hammer the end into the groove. It should be very close to the starting end. If there is a small gap don't worry about it. Wipe off any residue of glue. Again, use a damp cloth not a saturated one. Any water getting on the glue in the groove will deteriorate the effectiveness of the glue.
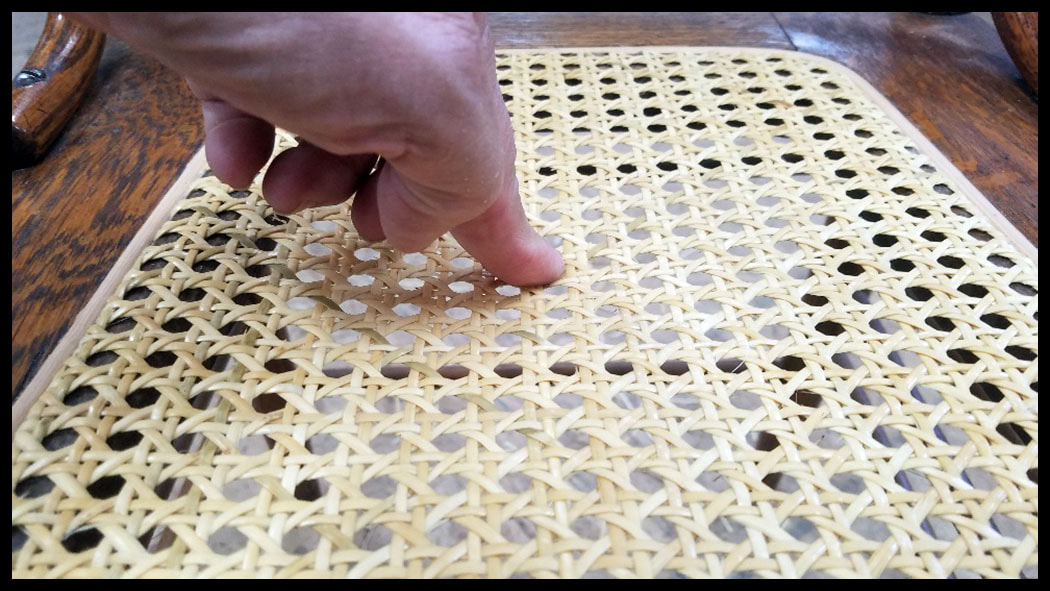
When you are finished installing the spline you will be able to press it down a half an inch or so with your finger because the cane is wet. When it dries it will be as shrink slightly causing the seat to be as tight as a drum. And you might be surprised at how good of a job you did.
The chair is not ready for use until the cane and spline have fully dried. I recommend 48 hours as a norm and more if the chair has a large seat or back. You want the cane and glue to be fully dry before you allow anyone to sit on it. Seriously, don't let anyone sit on it yet!
|
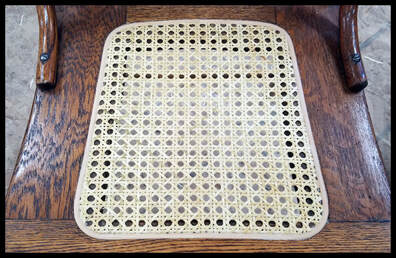
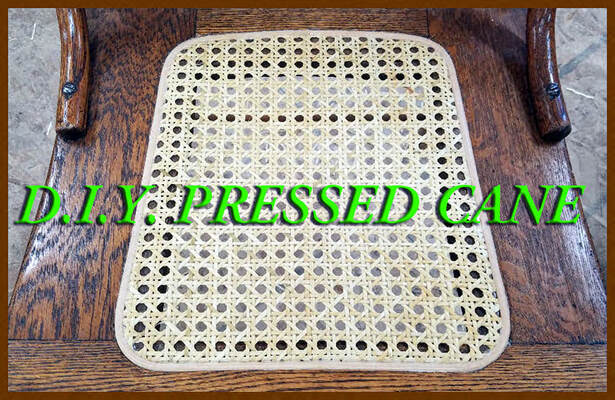
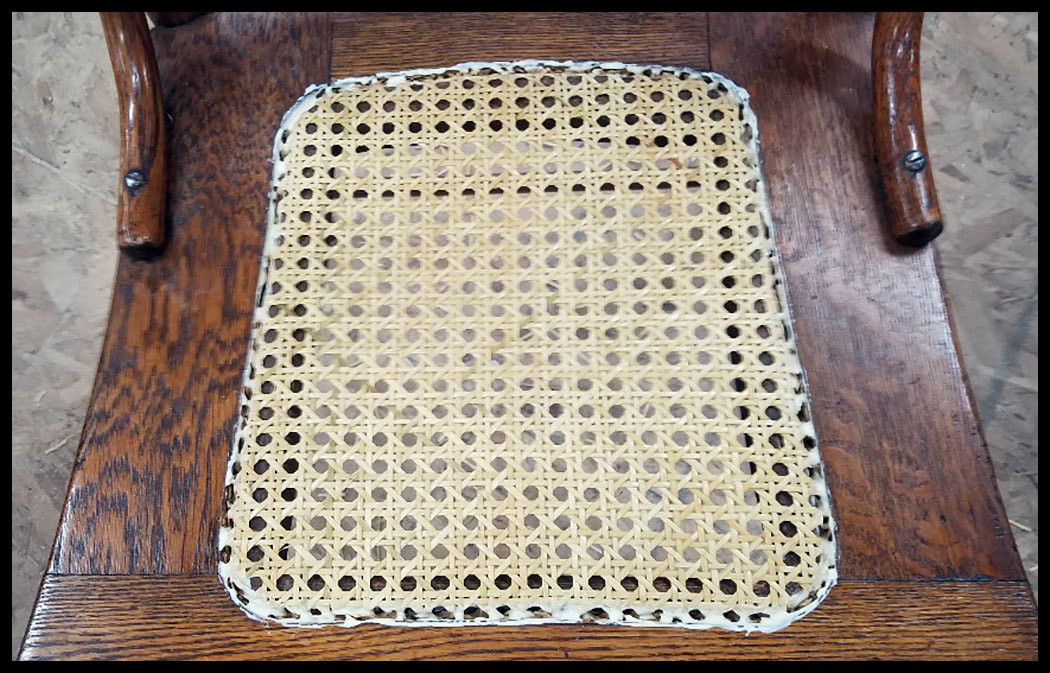
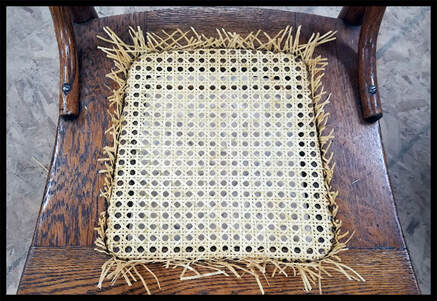
Finished seat and yours can come out just as nice
|
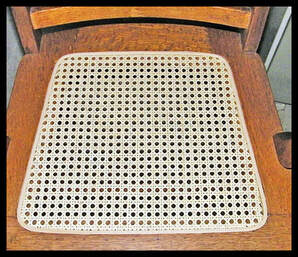
This is another finished seat from a previous project
|