
|
|
|
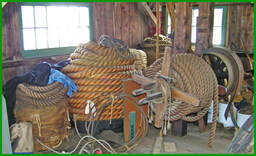
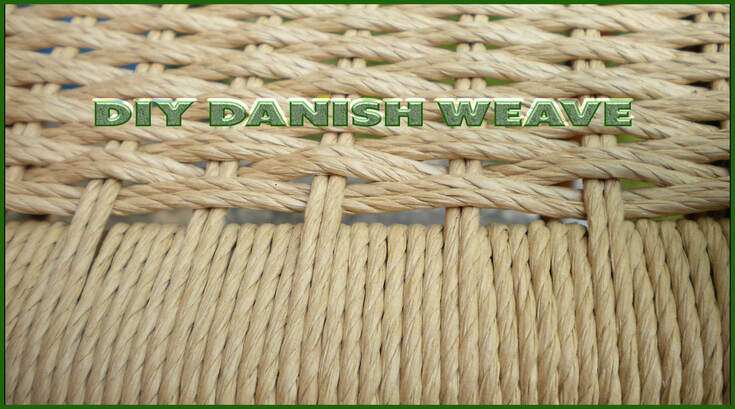
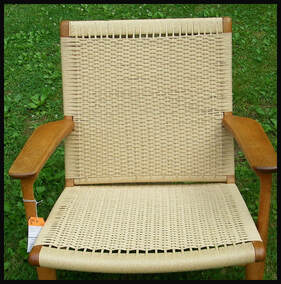
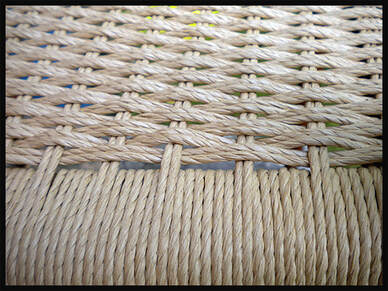
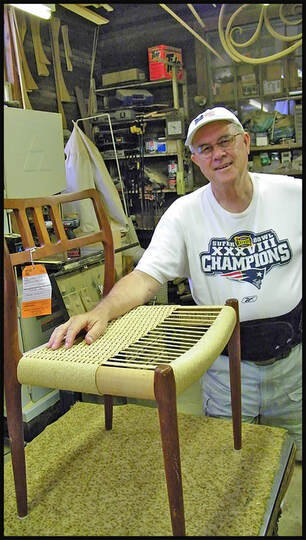
Danish weave is a robust paper strand made up of 3 threads of flat paper twisted together to make one strand. It is quite strong, and after it has been sat on a number of times the surface will pick up a slight sheen. The chair below is a weave example of both seat and backrest. The backrest of the chair is woven on both sides, resulting in a finished look for both back and front. This lesson is about replacing a Danish weave seat. The example chair does not have a woven backrest. The center image above was from a different weave project.
Important: If you have a chair with the broken seat weave still on it, that is goodness. This allows you to count strands. The weave must be balanced and symmetrical and you have to determine that arrangement before you start weaving. This figuring out is necessary at the first layer. There are functionally 2 separate layers of the weave, one laid before the next, even though it is all one when the weaving is complete. After you have counted and figured out the number of strands and wraps the next thing to do is to remove the old seat, if this hasn't already been done. Use a sharp utility knife to carefully and safely cut through the strands. Make sure you do this to the inside area of the chair for maximum safety purposes. While it is hard to tell in the photos, the 4 outer sides of the seat are curved for aesthetic and practical purposes, practical in ensuring there are no sharp exterior corners that would place undue stress on the strands. Danish weave is very durable and pleasing to the eye and will normally last for many years if not properly woven or abused.

|
The Danish weave strand is approximately 1/8 inch (.125") in diameter and that dimension is used to divide the linear spaces to determine the number of wraps and strands on the front and back rails. It is normal, in almost all chairs, to find the back of the seat slightly narrower than the front. That being the case it would be understandable that the number of wraps on the back rail will need to be less than the front. On our example chair above, the front rail measures 16.75 inches from the inside of the left and right chair legs. A couple of things to consider here. The front to back double strands must be designed as an uneven number in order for the seat to look symmetrical. For strength and wear purposes we made the left and right rows (set of strands) to be a quantity of 4. Doing that makes the remaining length 15.75 inches. Playing with that number, we decided on 15 double-strand rows to the back and 16 6-strand filler wraps in between. Now let's go through the dimensions in detail. The left and right rows have a total of 8 strands, for a width of 1 inch. The 15 double row strands equals 3.75 inches, and the 16, 6-strand wraps equals 96 strands, or 12 Inches, for a total of 16.75 inches for the front rail. Now we calculate the back rail in a similar manner making sure of a certain level of symmetry.
|
For the back rail we came up with the following: Two left and right rows of 4 strands each (making 8 strands) and 15 double-row strands have to be included, of course, to mate with the front rail. That dimension is 4.75 inches. Now we subtract that number from the 15.5 inches available and get 10.75 inches. We decided to break it up as follows: Starting from either left or right, 3 rows of 6 wraps (each side) and 10 rows of 5 wraps in the middle.
Danish nails, or 'L' shaped nails
|
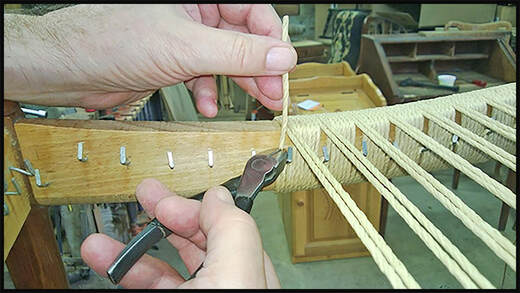
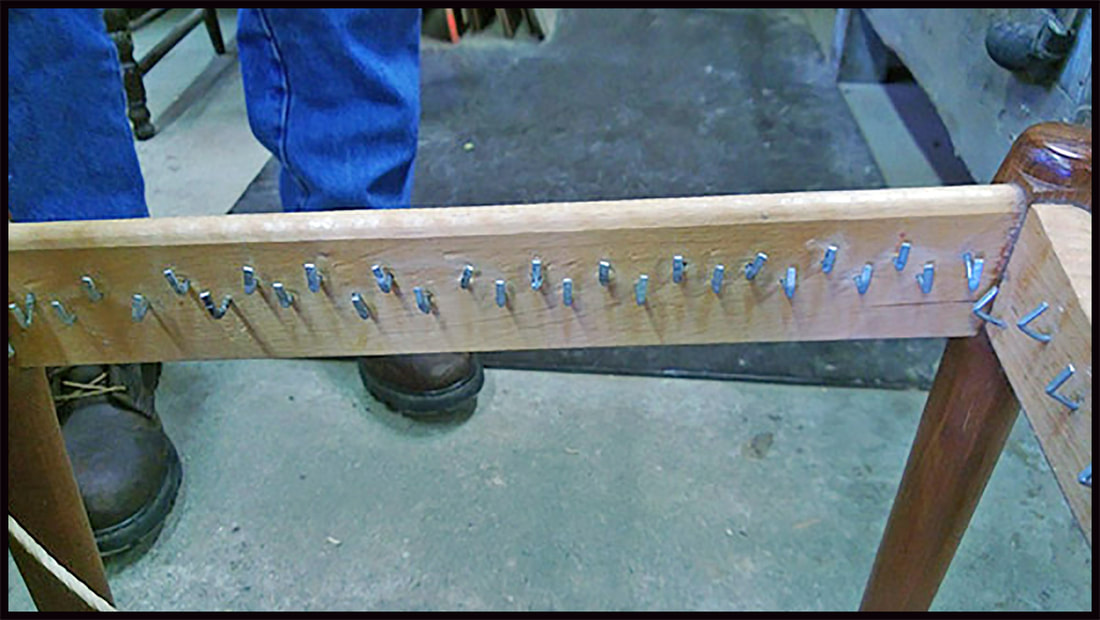
One aspect of this type of weave is, it uses 'L' shaped nails (named Danish nails) for rail wrapping or return of the strands. For a chair that is going to be repaired, the Danish nails will already be installed, as you can see in the photo to the left. Some may have been broken when the weave was removed in preparation for a new seat. Check out the rows of nails to see if any are missing and/or need replacing or re-bending. A store which provides caning supplies usually carries this type of weave along with 'Danish nails'. If you only need to replace a few nails you can use finish nails of the same approximate diameter. You are going to hammer them in, and it's a good idea to pre-drill a pilot hole for the replacements. The wood used in Danish chairs is usually a hardwood (often maple) and will not allow a hammered nail to penetrate well without the pre-drilling; you don't want to take a chance on cracking the wood rails around the seat and the majority of today's nails are not very strong or hard.
|
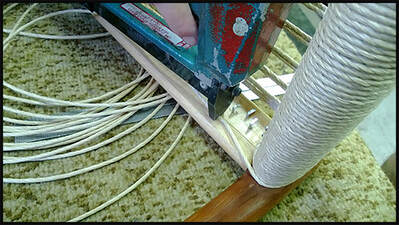
Also, I don't recommend using a nail gun. On the other hand, using a staple gun to retain the ends of the strands is more than acceptable; just make sure the staples are short. Once the nails are hammered in good and tight, bend them up at a slightly less than 90-degree angle, measured from the rail. While the number of Danish nails has already been determined by the manufacturer, there should be enough to stay reasonably in line with the strands as the weaving takes place. That usually translates to 2 wraps around each nail and in some cases 3 three wraps. In the corners on the last row or two you may even find yourself going to the adjacent side for an available nail.
|
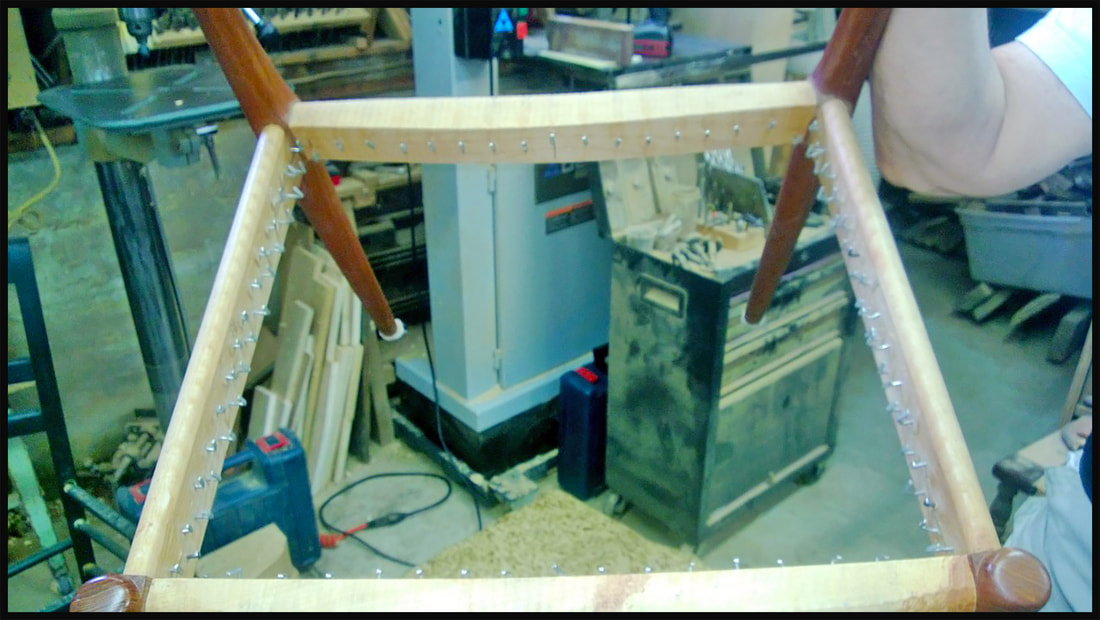
This photo (left) and the one above gives you an understanding of what the front, back, and side rails would look like after you remove the old weave, i.e. a bunch of 'L' nails or similar.
|
|
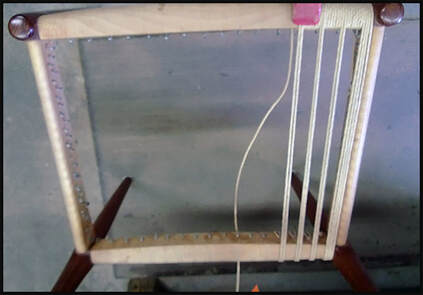
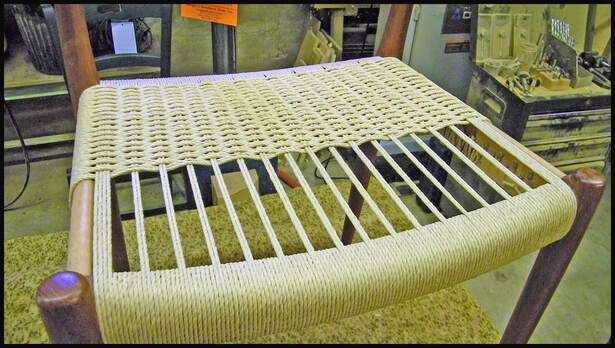
In this photo right and the one below you can make out the curves on the front rail of the chair, which is at the top of the photo. We will replace this photo for a better one the next time I weave a Danish weave chair. If the old seat was left in place you know the spacing of the wraps and strands. If it wasn't, no problem, you have already been shown the basics of the weave in the paragraphs above on how to get started. The first strand can be stapled to the side rail and strung under the front rail and over the top, then on to the rear rail and down over and under to pick up a nail and up and back over to the front. Repeat as needed for the number of strands you want in the left and right rows. In our case there are 4 strands. I usually pull off approx. 70 plus feet of strand (rope) to work with; any more than that and it gets awkward. Even 70 feet can be awkward for the beginner, but you don't want to make too many separations. 70 feet is actually a good compromise, but that of course is dependent on the width and depth of the chair. Be careful not to let the strand get kinked or knotted; remember, it's paper. After the first 4 strands have been woven at the side of your chair (a right-handed person would start off from the left side) you are going to start wrapping the front rail 6 times, as we calculated. After the six wraps you hook the strand over the next nail so you can change direction and bring the strand over the front rail and to the back rail. Go over and around the back rail hook (nail), change directions an bring back over the rail to the front for more wraps. Continue this process with 2 rows and 6 wraps to the other side.
|
You are not wrapping the rear rail just yet. You'll do that last on the first layer. Try to keep the 2-strand rows aligned to the back rail. If you are not comfortable with doing that by eye you can place pencil marks roughly where the 2 strands go by counting the strands across and multiplying by 1/8 of an inch. In this example there are 4 strands (1/2" and then six wraps (3/4") and then 2 strands (1/4"); this is done 3 times. Using this or any other method you are comfortable with, continue weaving the first layer with no filler wraps on the back.
The end of your length of strand
|
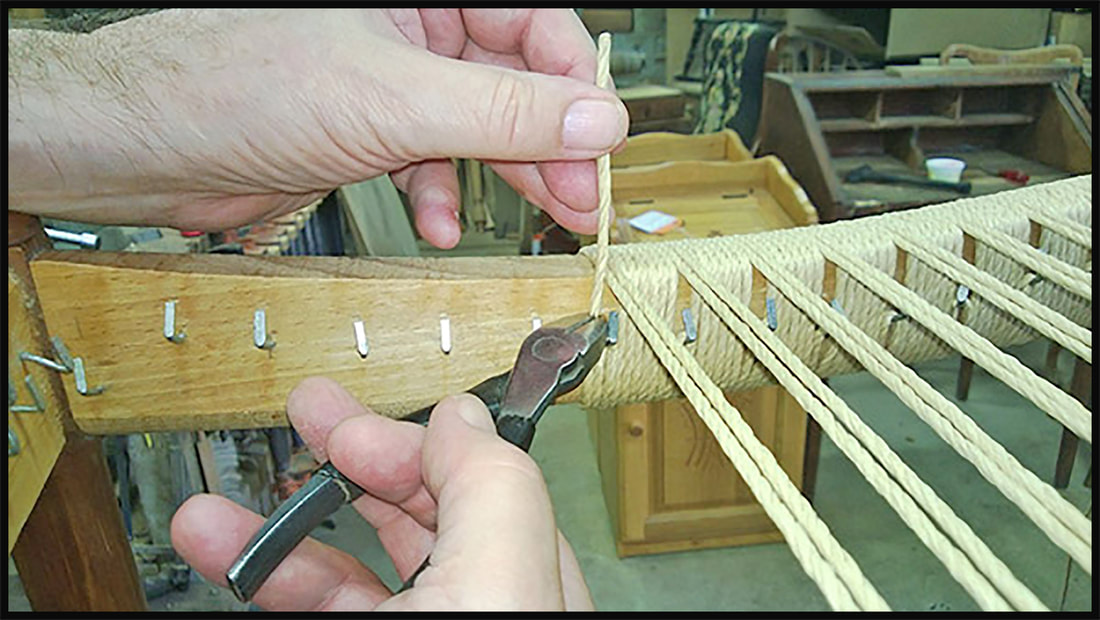
I mentioned that I use approximately 70 feet to get started. Once you come to the end of each strand use a staple gun to hold the strand in place; cut off the excess no less than a quarter of an inch away from the staple. Do this for all finished strand ends.
|
Simply staple off the strand when the front rail weaving is completed. Cut the strand off as mentioned previously. I have stated use a staple gun, but upholstery tacks can also be used to start or end the strand. I believe the staple will hold better.

Front rail wrap outer view
|
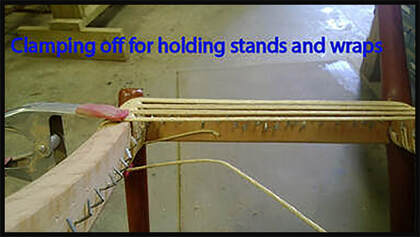
While weaving you do want to keep the strands taunt, but don't be too concerned and don't over-tighten them. The seat has a tendency to stabilize and will have little give to it when done, slightly less than, say, a pressed-cane seat.
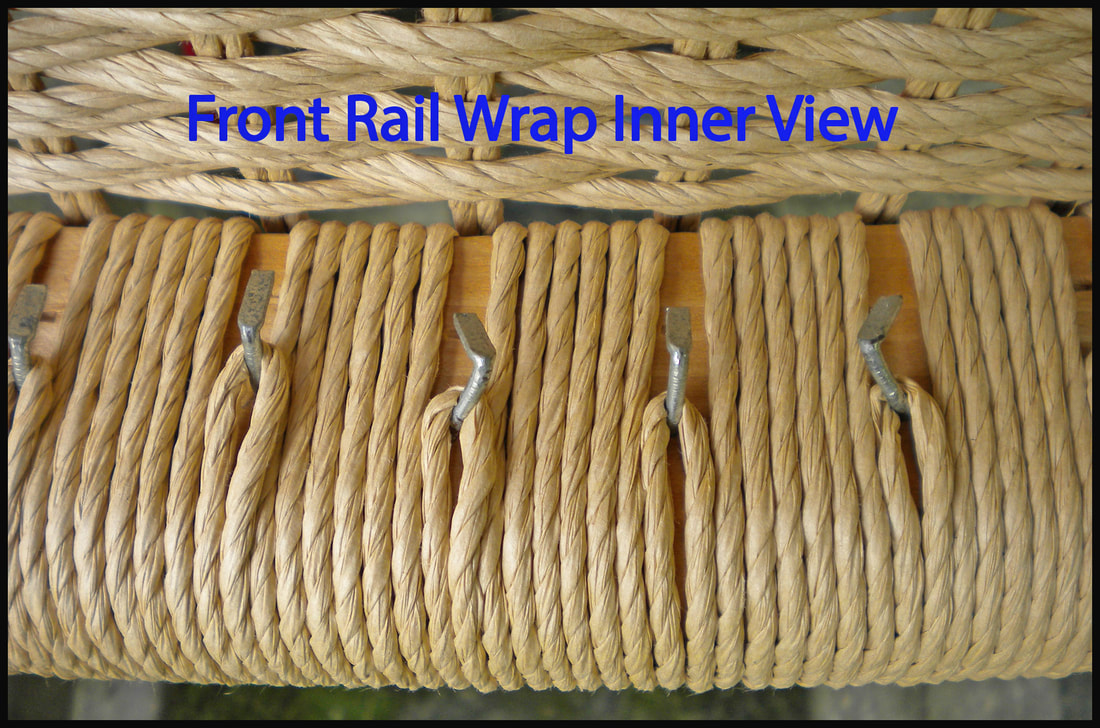
The left photo shows the weave complete but I wanted to show a close up of the front rail. You can see the strand count as well. |
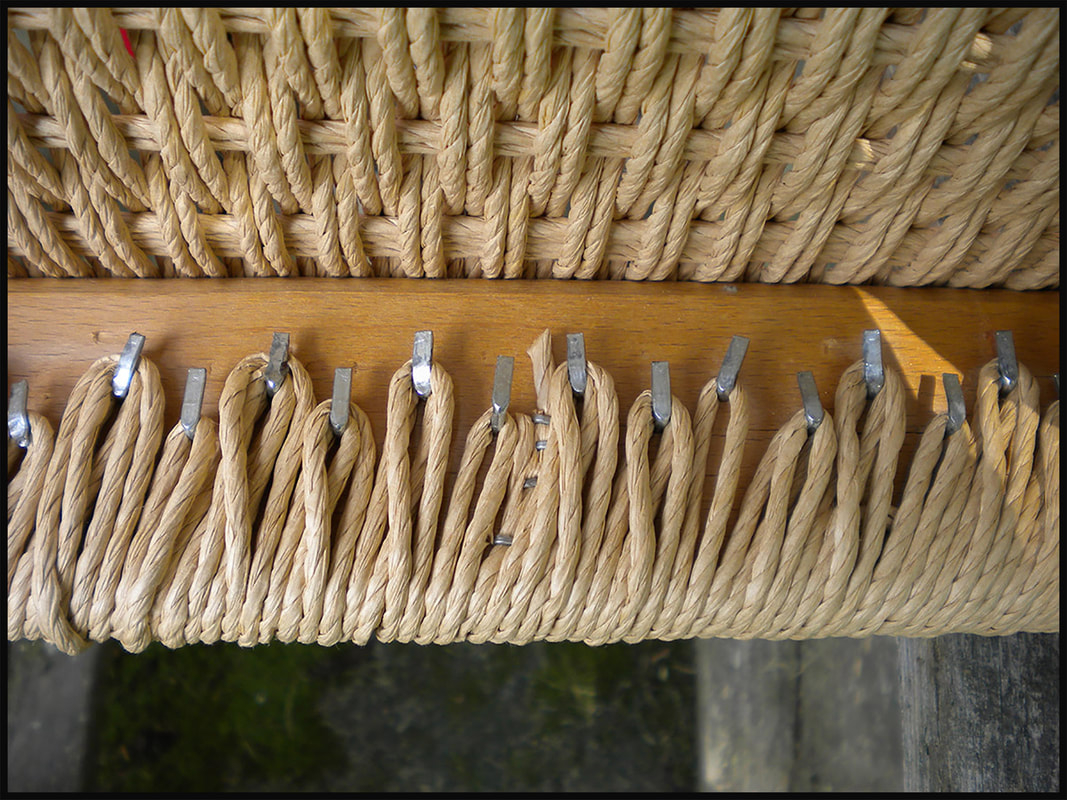
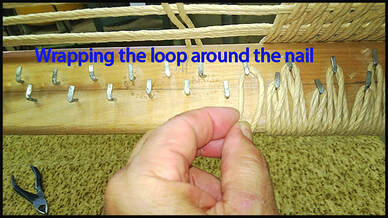
Hooking the strands to the Danish nails
|
This photo shows the simple method of using the nails for returning the wrap or row in the opposite direction. The light- colored 'arrow' at the right is just a reflection of light coming in; disregard it! You will note that some of the nails have 3 strands, 2 strands and 1 stand wrapping around them. Wrap as required to maintain alignment. The key is to use the nails under or near the wrap, and it is important to keep strands together at the bottom of the rails. You want them to be nice and even and touching each other. As you go along you may want to use a hard edged ruler (I use a metal ruler from my sliding square) to push and pull the stands back and forth to keep them even or to squeeze them in, as will be the case as you close in at the front.

|
This shows the crossing over of the front to back double strand rows. Staple or tack the strand to the inside of the back rail next to the back leg. Wrap the space between the double strands with the amount of wraps you have calculated previously. Work your way across the back keeping the wraps between the nails so it looks neat and clean. When you reach the opposite side staple or tack off the strand on the inside of the back rail.
|
|
This photo shows the weave complete but I wanted to show a close up of the back rail. You can see the strand count here as well. Note the 5 and 6 count strand wraps as identified above, left.
|
Don't worry about a little space here and there. The secret to the good look of a finished seat is keeping the strands as straight as you can as you go. You can close them up near the end of the weave. When you get to the end you may want to do what I do to get a good clean look. I stand at the front of the chair and use my fingertips to start pulling the strands parallel to me (across the chair) closer to the front to close up any gaps. I continue to do this all the way back to the last strands. A little space in the back is a better look than a little space in the front. This spacing issue is not often a problem, so don't get too concerned; your chair will look great when you finish.
|
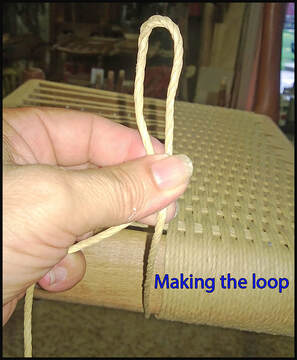
Start from under the rail at one side or the other. Starting at the back of a side rail, begin to weave a 2-strand row, see the loop in the photo below it looks just like the 2-strand rows going from front to back) over and under the row across the chair. When you reach the opposite side rail you wrap off to the nearest nail, then continue by going down and back over in an opposite over and under weave towards the opposing rail. Simply repeat this process until the weave has reached the front of the chair. In the process keep pushing and pulling each row towards the back of the chair to keep the rows straight and even. Using the same length of strand material of 70 feet you will have to add new material several times before you come to the end if the chair you are working on is similar in size to our example chair.
During the weaving process you may want to use that steel edged ruler to keep the stands and wraps even across the bottom. There may be a little squeezing and pulling to achieve a nice seat, but it is all part of the process. Don't worry about a little space here and there. The secret to the good look of a finished seat is keeping the strands as straight as you can as you go. You can close them up near the end of the weave. When you get to the end you may want to do what I do to get a good clean look. I stand at the front of the chair and use my fingertips to start pulling the strands parallel to me (across the chair) closer to the front to close up any gaps. I continue to do this all the way back to the last strands. A little space in the back is a better look than a little space in the front. This spacing issue is not often a problem, so don't get too concerned; your chair will look great when you finish. Continue to read left and read more detail below... |
|
|
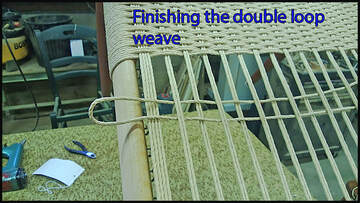
Showing the down-and-over alternating weave. As you get to the end of the loop pull more strand material to make the loop longer. Keep the loop no longer than 5". Experiment on your own to determine the exact length you can handle. Another thing, I recommend that you don't use a metal wire to pull the loop through. There may be some good ways to do that but, so far we have not had good results.
|
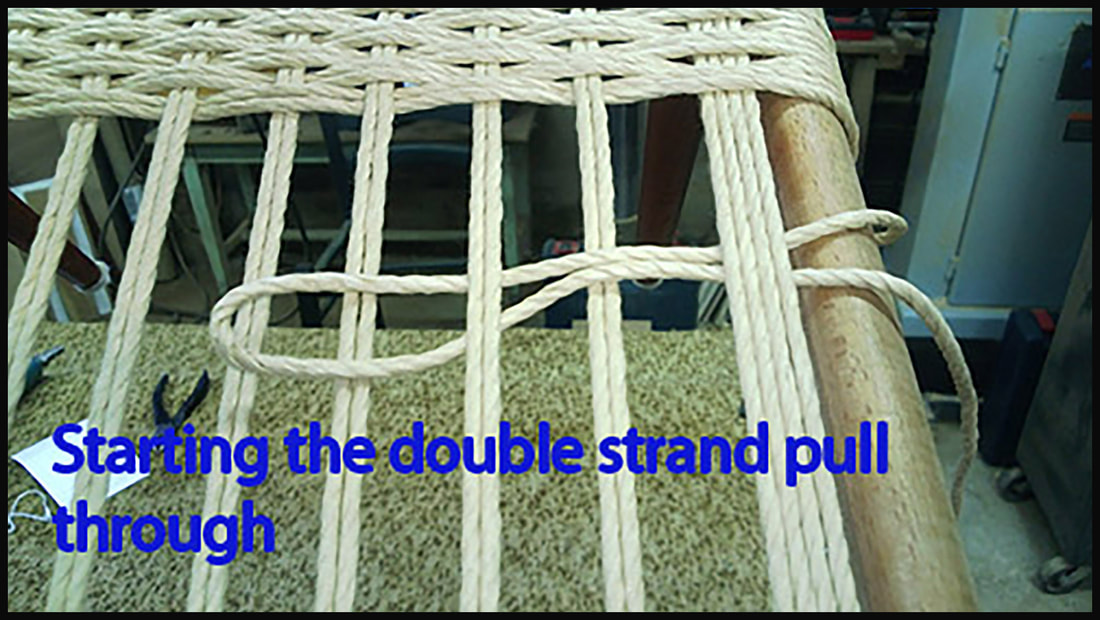
The double strand alternating up and over the first layer strands is almost complete. Keeping pulling more strand material to allow it to bend around the side rail and hook over the nail on the inside.
Keep the length to just a bit more than you need for each aspect of the weave. This helps keep the strand from kinking or tangled as it comes from the 70 foot pile of strand sitting on the floor. This is pretty much of a must.
|
|
Keep the bottom of your loop against the previous double strand. When the loop is hooked over the nail the tag or loose end is pulled tight to complete the double row. The tag or loose end is brought around the rail and hooked over a nail and brought back up to make another loop. You also take the remaining single strand, pull enough to make another loop like the previous 'starting' loop, and repeat the weave to the opposite rail. Just keep doing this until you are completely finished and you squeeze in as many loop rows as possible without having them overlap. Once the weave is complete, hammer all the nails bending them to close the gap at the top. This eliminates the possibility of the loops coming off later as the chair gets worn-in.
Elder brother Roger learning to Danish Weave (Different chair than shown in this lesson)
|
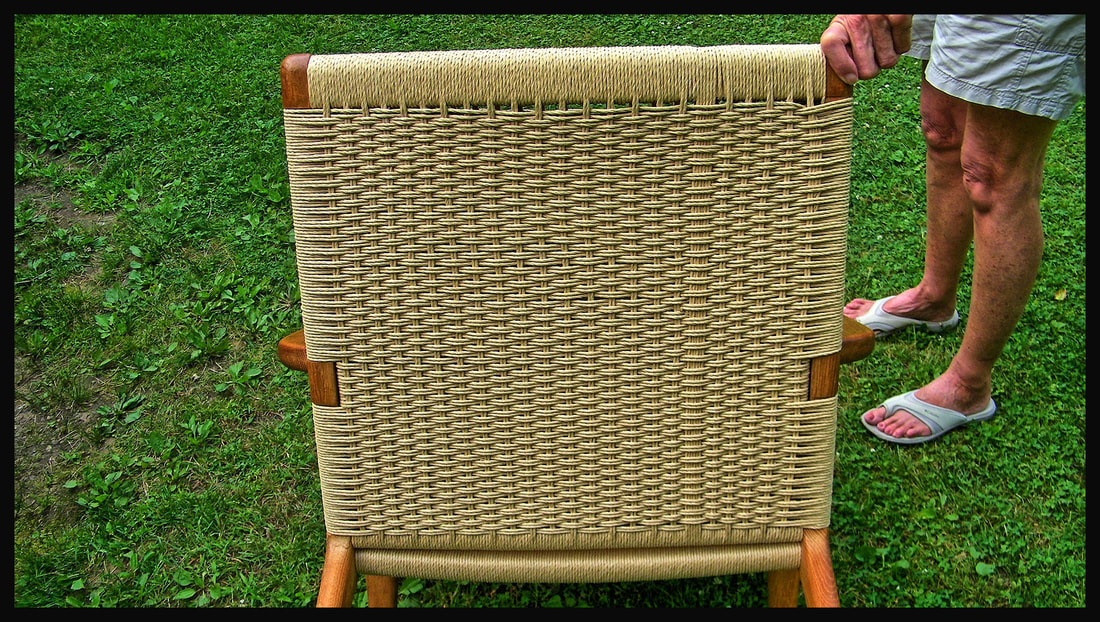
A view of the back rest, outer,
side of our project |